资源简介
基于opencv和python的骨架提取代码,利用击中不击中变化实现细化操作。切分以后,结合深度学习识别技术,可以对字符 数字等印刷体有一个比较理想的分割和识别效果。本人亲测 有生成结果图片和原图片对照实例,可以动态展示骨架提取过程,具体参照rar文件包。有问题随时沟通。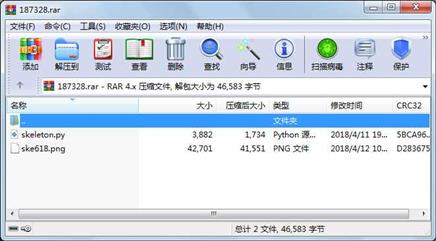
代码片段和文件信息
#!/usr/bin/env python
# -*- coding: utf-8 -*-
import cv2
from imutils import resize
from imutils.contours import sort_contours

from skimage.morphology import skeletonize as skl
import numpy as np

img = cv2.imread(‘D:\job\img\kongquekaiping\\301\\301.jpg‘0)

#path = ‘D:\job\img\kongquekaiping\\301\\301.png‘
#path = ‘cat.jpg‘
#img = cv2.imread(path 0)
# Some smoothing to get rid of the noise
# img = cv2.bilateralFilter(img 5 35 10)
img = cv2.GaussianBlur(img (3 3) 3)
img = resize(img width=700)

# Preprocessing to get the shapes
th = cv2.adaptiveThreshold(img 255 cv2.ADAPTIVE_THRESH_GAUSSIAN_C
                           cv2.THRESH_BINARY 35 11)
# Invert to hightligth the shape
th = cv2.bitwise_not(th)

# Text has mostly vertical and right-inclined lines. This kernel seems to
# work quite well
kernel = np.array([[0 1 1]
                  [0 1 0]
                  [1 1 0]] dtype=‘uint8‘)

th = cv2.morphologyEx(th cv2.MORPH_CLOSE kernel)

cv2.imshow(‘mask‘ th)
cv2.waitKey(0)


#def contour_sorter(contours):
#    ‘‘‘Sort the contours by multiplying the y-coordinate and sorting first by
#    x then by y-coordinate.‘‘‘
#    boxes = [cv2.boundingRect(c) for c in contours]
#    cnt = [4*y x for y x  _ _ in ]

# Skeletonize the shapes
# Skimage function takes image with either True False or 01
# and returns and image with values 0 1.
th = th == 255
th = skl(th)
th = th.astype(np.uint8)*255

# Find contours of the skeletons
_ contours _ = cv2.findContours(th.copy() cv2.RETR_EXTERNAL
                                  cv2.CHAIN_APPROX_NONE)
# Sort the contours left-to-rigth
contours _ = sort_contours(contours )
#
# Sort them again top-to-bottom


def skeleton_endpoints(skel):
    # Function source: https://stackoverflow.com/questions/26537313/
    # how-can-i-find-endpoints-of-binary-skeleton-image-in-opencv
    # make out input nice possibly necessary
    skel = skel.copy()
    skel[skel != 0] = 1
    skel = np.uint8(skel)

    # apply the convolution
    kernel = np.uint8([[1  1 1]
                       [1 10 1]
                       [1  1 1]])
    src_depth = -1
    filtered = cv2.filter2D(skel src_depthkernel)

    # now look through to find the value of 11
    # this returns a mask of the endpoints but if you just want the
    # coordinates you could simply return np.where(filtered==11)
    out = np.zeros_like(skel)
    out[np.where(filtered == 11)] = 1
    rows cols = np.where(filtered == 11)
    coords = list(zip(cols rows))
    return coords

# List for endpoints
endpoints = []
# List for (x y) coordinates of the skeletons
skeletons = []


for contour in contours:
    if cv2.arcLength(contour True) > 100:
        # Initialize mask
        mask = np.zeros(img.shape np.uint8)
        # Bounding rect of the contour
        x y w h = cv2.boundingRect(contour)
        mask[y:y+h x:x+w] = 255
属性 大小 日期 时间 名称
----------- --------- ---------- ----- ----
文件 42701 2018-04-12 10:37 ske618.png
文件 3882 2018-04-11 19:15 skeleton.py
----------- --------- ---------- ----- ----
46583 2
相关资源
- pywin32_python3.6_64位
- python3环境搭建教程.ppt
- python3.5可用的scipy
- PYTHON3 经典50案例.pptx
- python3.5.2.chm官方文档
- python3.5.4_windows下32与64位安装包
- GitHack-python3.zip
- Python3.x+PyQtChart实现数据可视化界面
- python3根据模板图片批量自动制作个性
- 《机器学习实战》源代码Python3
- Python3.5.2的IDLE汉化版计算机等级考试
- python3.5 百度ai人脸识别
- python3实现的国密SM2+SM3
- python100道面试题及解答全部答案 pyc
- #python3.3关于Tk中的Treeview使用方法
- Python3.x+Pyqt5实现界面编程浏览网页
- 《机器学习实战》Python3代码
- Python3学习笔记
- Python3.7.2中文文档-标准库-通用操作系
- Python3.7.2中文文档-标准库-Python数据类
- python3基础教程第三版高清
- 随机森林python3实现代码(带数据集)
- dlib-19.18.0-cp37-cp37m-linux_armv7l.whl
- python3学习路线+思维导图
- Learn python3 the hard way
- 笨办法学python 3 第四版 英文
- python3爬虫
- Beginning Python: From Novice to Professional
- Python3实现KNN的三个包含数据集,水果
- python3中文帮助手册和英文帮助手册
 川公网安备 51152502000135号
评论
共有 条评论