资源简介
主要使用了OpenCV的视频采集, 图像色域转换, 颜色通道分割, 高斯滤波, OSTU自动阈值, 凸点检测, 边缘检测, 余弦定理计算手势等功能,实现手势识别与控制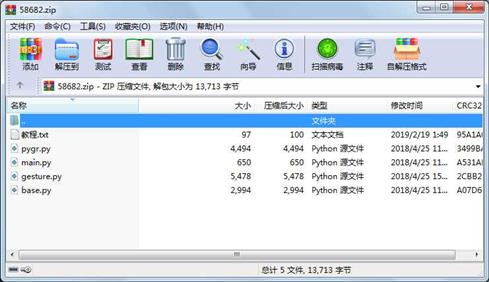
代码片段和文件信息
# imports - standard imports
import io
import base64

# imports - third-party imports
import numpy as np
from PIL import Image
import cv2


class Config(object):
    NAME = ‘pygr‘
    VERSION = ‘0.1.0‘
    PyGR_SIZE = (480 320)


class Keycode(object):
    ESCAPE = 27
    Q = ord(‘Q‘)
    q = ord(‘q‘)


class Event(object):
    ‘‘‘
    Event object
    ‘‘‘
    NONE = None
    ROCK = 0  # 石头
    SCISSOR = 1  # 剪刀
    SPOCK = 2
    PAPER = 4  # 布

    ZERO = 0
    ONE = 1
    TWO = 2
    THREE = 3
    FOUR = 4
    FIVE = 5

    def __init__(self type_=None):
        self.type = type_
        self.tip = (None None)

    def setType(self type_):
        self.type = type_

    def setTip(self position):
        self.tip = position

    def get_tip(self):
        return self.tip


class Util(object):
    @staticmethod
    def resize_image(image size maintain_aspect_ratio=False):
        copy = image.copy()
        copy.thumbnail(size Image.ANTIALIAS)
        return copy

    @staticmethod
    def round_int(value):
        result = int(np.rint(value))
        return result

    @staticmethod
    def to_grayscale(array):
        gray = cv2.cvtColor(array cv2.COLOR_BGR2GRAY)
        return gray

    @staticmethod
    def get_opencv_version():
        version = cv2.__version__
        version = version.split(‘.‘)
        major minor patch = int(version[0]) int(version[1]) int(version[2])
        return (major minor patch)

    @staticmethod
    def mount_roi(array roi color=(0 255 0) thickness=1):
        x y w h = roi
        cv2.rectangle(array (x y) (x + w y + h)
                      color=color thickness=thickness)
        return array

    @staticmethod
    def image_to_bytes(image format_=‘.jpg‘):
        array = np.asarray(image)
        _ jpeg = cv2.imencode(format_ array)
        bytes_ = jpeg.tobytes()
        return bytes_

    @staticmethod
    def base64_str_to_image(string):
        decode = base64.b64decode(string)
        bytes_ = io.BytesIO(decode)
        image = Image.open(bytes_)
        return image


class Capture(object):
    ‘‘‘
    Capture object

    :param deviceID: device ID of your capture device defaults to 0
    :type deviceID: :obj:‘int‘

    Example

    >>> import pygr
    >>> cap = pygr.Capture()
    ‘‘‘

    def __init__(self deviceID=0):
        self.deviceID = deviceID
        self.capture = cv2.VideoCapture(self.deviceID)

    def read(self):
        ‘‘‘
        Reads the current input stream from a capture device and returns a ‘PIL.Image‘ object

        >>> import pygr
        >>> cap   = pygr.Capture()
        >>> image = cap.read()
        >>> image.show()
        ‘‘‘
        _ frame = self.capture.read()
        frame = cv2.bilateralFilter(frame 5 50 100)  # 双边滤波
        image = Image.fromarray(frame)

        return image
属性 大小 日期 时间 名称
----------- --------- ---------- ----- ----
文件 2994 2018-04-25 11:03 ba
文件 5478 2018-04-25 15:42 gesture.py
文件 650 2018-04-25 11:34 main.py
文件 4494 2018-04-25 11:03 pygr.py
文件 97 2019-02-19 01:49 教程.txt
相关资源
- pywin32_python3.6_64位
- python+ selenium教程
- PycURL(Windows7/Win32)Python2.7安装包 P
- 英文原版-Scientific Computing with Python
- 7.图像风格迁移 基于深度学习 pyt
- 基于Python的学生管理系统
- A Byte of Python(简明Python教程)(第
- Python实例174946
- Python 人脸识别
- Python 人事管理系统
- 基于python-flask的个人博客系统
- 计算机视觉应用开发流程
- python 调用sftp断点续传文件
- python socket游戏
- 基于Python爬虫爬取天气预报信息
- python函数编程和讲解
- Python开发的个人博客
- 基于python的三层神经网络模型搭建
- python实现自动操作windows应用
- python人脸识别(opencv)
- python 绘图(方形、线条、圆形)
- python疫情卡UN管控
- python 连连看小游戏源码
- 基于PyQt5的视频播放器设计
- 一个简单的python爬虫
- csv文件行列转换python实现代码
- Python操作Mysql教程手册
- Python Machine Learning Case Studies
- python获取硬件信息
- 量化交易(附python常见函数的使用方
 川公网安备 51152502000135号
评论
共有 条评论