资源简介
python实现BP神经网络的源代码,以及使用的马疝病数据集。

代码片段和文件信息
import numpy as np

def loaddataset(filename):
	fp = open(filename)

	#存放数据
	dataset = []

	#存放标签
	labelset = []
	for i in fp.readlines():
		a = i.strip().split()

		#每个数据行的最后一个是标签
		dataset.append([float(j) for j in a[:len(a)-1]])
		labelset.append(int(float(a[-1])))
	return dataset labelset


#x为输入层神经元个数,y为隐层神经元个数,z输出层神经元个数
def parameter_initialization(x y z):

	#隐层阈值
	value1 = np.random.randint(-5 5 (1 y)).astype(np.float64)

	#输出层阈值
	value2 = np.random.randint(-5 5 (1 z)).astype(np.float64)

	#输入层与隐层的连接权重
	weight1 = np.random.randint(-5 5 (x y)).astype(np.float64)

	#隐层与输出层的连接权重
	weight2 = np.random.randint(-5 5 (y z)).astype(np.float64)

	return weight1 weight2 value1 value2

def sigmoid(z):
	return 1 / (1 + np.exp(-z))

‘‘‘
weight1:输入层与隐层的连接权重
weight2:隐层与输出层的连接权重
value1:隐层阈值
value2:输出层阈值
‘‘‘
def trainning(dataset labelset weight1 weight2 value1 value2):
	#x为步长
	x = 0.01
	for i in range(len(dataset)):
		#输入数据
		inputset = np.mat(dataset[i]).astype(np.float64)
		#数据标签
		outputset = np.mat(labelset[i]).astype(np.float64)
		#隐层输入
		input1 = np.dot(inputset weight1).astype(np.float64)
		#隐层输出
		output2 = sigmoid(input1 - value1).astype(np.float64)
		#输出层输入
		input2 = np.dot(output2 weight2).astype(np.float64)
		#输出层输出
		output3 = sigmoid(input2 - value2).astype(np.float64)

		#更新公式由矩阵运算表示
		a = np.multiply(output3 1 - output3)
		g = np.multiply(a outputset - output3)
		b = np.dot(g np.transpose(weight2))
		c = np.multiply(output2 1 - output2)
		e = np.multiply(b c)

		value1_change = -x * e
		value2_change = -x * g
		weight1_change = x * np.dot(np.transpose(inputset) e)
		weight2_change = x * np.dot(np.transpose(output2) g)

		#更新参数
		value1 += value1_change
		value2 += value2_change
		weight1 += weight1_change
		weight2 += weight2_change
	return weight1 weight2 value1 value2

def testing(dataset labelset weight1 weight2 value1 value2):
	#记录预测正确的个数
	rightcount = 0
	for i in range(len(dataset)):
		#计算每一个样例通过该神经网路后的预测值
		inputset = np.mat(dataset[i]).astype(np.float64)
		outputset = np.mat(labelset[i]).astype(np.float64)
		output2 = sigmoid(np.dot(inputset weight1) - value1)
		output3 = sigmoid(np.dot(output2 weight2) - value2)

		#确定其预测标签
		if output3 > 0.5:
			flag = 1
		else:
			flag = 0
		if labelset[i] == flag:
			rightcount += 1
		#输出预测结果
		print(“预测为%d   实际为%d“%(flag labelset[i]))
	#返回正确率
	return rightcount / len(dataset)

if __name__ == ‘__main__‘:
	dataset labelset = loaddataset(‘horseColicTraining.txt‘)
	weight1 weight2 value1 value2 = parameter_initialization(len(dataset[0]) len(dataset[0]) 1)
	for i in range(1500):
		weight1 weight2 value1 value2 = trainning(dataset labelset weight1 weight2 value1 value2)
	rate = testing(dataset labelset weight1 weight2 value1 value2)
	print(“正确率为%f“%(rate))
属性 大小 日期 时间 名称
----------- --------- ---------- ----- ----
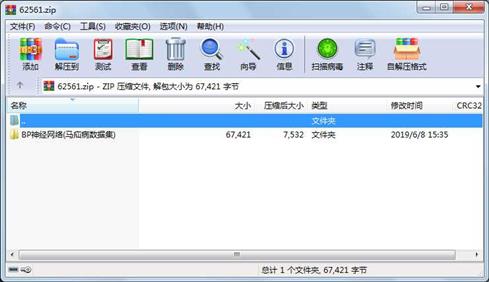
文件 3342 2019-06-08 15:34 BP神经网络(马疝病数据集)\BP神经网络.py
文件 3722 2019-05-30 20:41 BP神经网络(马疝病数据集)\horseColicTest.txt
文件 60357 2019-05-30 20:41 BP神经网络(马疝病数据集)\horseColicTraining.txt
目录 0 2019-06-08 15:35 BP神经网络(马疝病数据集)\
- 上一篇:指纹图像增强源码.rar
- 下一篇:Python二十多种常用图像处理方法集成工具
相关资源
- pywin32_python3.6_64位
- python+ selenium教程
- PycURL(Windows7/Win32)Python2.7安装包 P
- 英文原版-Scientific Computing with Python
- 7.图像风格迁移 基于深度学习 pyt
- 基于Python的学生管理系统
- A Byte of Python(简明Python教程)(第
- Python实例174946
- Python 人脸识别
- Python 人事管理系统
- 基于python-flask的个人博客系统
- 计算机视觉应用开发流程
- python 调用sftp断点续传文件
- python socket游戏
- 基于Python爬虫爬取天气预报信息
- python函数编程和讲解
- Python开发的个人博客
- 基于python的三层神经网络模型搭建
- python实现自动操作windows应用
- python人脸识别(opencv)
- python 绘图(方形、线条、圆形)
- python疫情卡UN管控
- python 连连看小游戏源码
- 基于PyQt5的视频播放器设计
- 一个简单的python爬虫
- csv文件行列转换python实现代码
- Python操作Mysql教程手册
- Python Machine Learning Case Studies
- python获取硬件信息
- 量化交易(附python常见函数的使用方
 川公网安备 51152502000135号
评论
共有 条评论