资源简介
Pythone+pyq5+opencv 多线程模式调用摄像头。这样你在识别人脸的时候,可以通过线程输出结果,这时候摄像头保持流畅视频。

代码片段和文件信息
“““
In this example we demonstrate how to create simple camera viewer using Opencv3 and PyQt5

Author: Berrouba.A
Last edited: 21 Feb 2018
“““

# import system module
import sys
import time
# import some PyQt5 modules
from PyQt5.QtWidgets import QApplication
from PyQt5.QtWidgets import QWidget
from PyQt5.QtGui import QImage
from PyQt5.QtGui import QPixmap
from PyQt5.QtCore import QTimer
from PyQt5.QtCore import *
# import Opencv module
import cv2

from ui_main_window import *


class Mythread(QThread):
    # 定义信号定义参数为str类型
    breakSignal = pyqtSignal(QPixmap)

    def __init__(self parent=None):
        super().__init__(parent)
        # 下面的初始化方法都可以,有的python版本不支持
        super(Mythread self).__init__()
        self.cap = cv2.VideoCapture(0)

    def run(self):

        while True:

            ret image = self.cap.read()
            # convert image to RGB format
            image = cv2.cvtColor(image cv2.COLOR_BGR2RGB)
            # get image infos
            height width channel = image.shape
            step = channel * width
            # create QImage from image
            qImg = QImage(image.data width height step QImage.Format_RGB888)
            # show image in img_label
            self.breakSignal.emit(QPixmap.fromImage(qImg))

        #self.ui.image_label.setPixmap(QPixmap.fromImage(qImg))

        ‘‘‘
        for i in range(2000000):
            # 发出信号
            print(12)
            a=[ii+1]
            self.breakSignal.emit(str(i))
            # 让程序休眠
            time.sleep(0.5)
        ‘‘‘


class Mythread2(QThread):
    # 定义信号定义参数为str类型
    breakSignal2 = pyqtSignal(str)

    def __init__(self parent=None):
        super().__init__(parent)
        # 下面的初始化方法都可以,有的python版本不支持
        super(Mythread2 self).__init__()


    def run(self):
        for i in range(2000000):
            # 发出信号
            print(12)
            a=[ii+1]
            self.breakSignal2.emit(str(i))
            # 让程序休眠
            time.sleep(0.5)

class MainWindow(QWidget):
    # class constructor

    def __init__(self):
        # call QWidget constructor
        super().__init__()
        self.ui = Ui_Form()
        self.ui.setupUi(self)

        #按钮启动现成
        self.ui.control_bt.clicked.connect(self.controlTimer)

        # 创建线程
        self.thread = Mythread()
        # 连接信号
        self.thread.breakSignal.connect(self.chuli)
        # 开始线程


          # 创建线程
        self.thread2 = Mythread2()
        self.thread2.breakSignal2.connect(self.chuli2)
        self.thread2.start()

    def chuli(selfqImg):
        self.ui.image_label.setPixmap(qImg)

    def chuli2(selfmsg):
        self.ui.control_bt.setText(msg)

    # start/stop timer
    def controlTimer(self):
        self.thread.start()


if __name__ == ‘__main__‘:
    app = QApplication(sys.argv)
    # create and show mainWindow
    mainWindow = MainWindow()
    mainWindow.show()

    sys.exit(app.exec_())
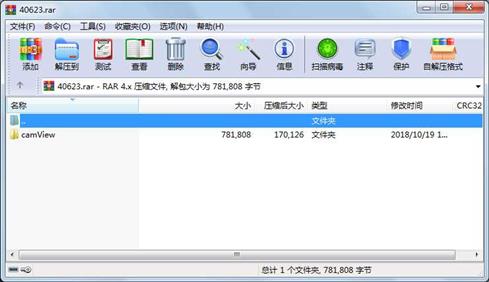
属性 大小 日期 时间 名称
----------- --------- ---------- ----- ----
文件 771499 2018-10-19 11:28 camView\build\main_window\ba
文件 1036 2018-10-19 11:28 camView\build\main_window\main_window.exe.manifest
文件 3159 2018-10-22 18:19 camView\main_window.py
文件 981 2018-10-19 11:28 camView\main_window.spec
文件 325 2018-02-22 13:17 camView\README.md
文件 1344 2018-02-22 13:17 camView\ui_main_window.py
文件 882 2018-02-22 13:17 camView\ui_main_window.ui
文件 1365 2018-02-22 13:17 camView\__pycache__\ui_main_window.cpython-35.pyc
文件 1217 2018-10-18 10:54 camView\__pycache__\ui_main_window.cpython-36.pyc
目录 0 2018-10-19 11:28 camView\build\main_window
目录 0 2018-10-19 11:26 camView\build
目录 0 2018-10-19 11:26 camView\dist
目录 0 2018-10-18 10:54 camView\__pycache__
目录 0 2018-10-19 11:26 camView
----------- --------- ---------- ----- ----
781808 14
- 上一篇:pcap-1.1.win32-py2.7.exe
- 下一篇:爬取瓜子二手车.py
相关资源
- python人脸识别(opencv)
- 图片智能拼接(opencv)
- 计算机视觉 opencv 数数.ipynb
- python opencv 银行卡识别.ipynb
- python opencv 图片更换背景. ipynb
- 计算机视觉 opencv 答题卡阅卷.ipynb
- 计算机视觉 opencv 检测不合格产品.
- 计算机视觉 opencv 做一个动态时钟.
- 计算机视觉 opencv 哈哈镜
- 计算机视觉 opencv 蒙太奇.ipynb
- 计算机视觉 opencv 超像素分割.ipynb
- 计算机视觉 opencv 医学图片处理.ipy
- 人脸检测和识别(opencv3+python)
- python检测图片是否有人脸
- python语言实现的基于opencv的表针识别
- OpenCV入门教程+OpenCV官方教程中文版
- opencv+Python的教程大全
- opencv手势识别
- Python+OpenCv项目代码
- python 识别物体跟踪
- 通过python使用opencv计算图像的中心
- 用Pythonopencv提取图像中的红色区域
- 段力辉大神翻译原版OpenCV-Python
- OpenCV-Python 中文教程278991
- OpenCV官方教程中文版Python版带完整书
- dlib18.17 编译好的python-dlib库 不需要
- OpenCV Python 手册
- 带图形界面、车牌识别源码python+ope
- 从视频中分离前景目标的Python & Matl
- Python opencv库 cv2.so (armhf版
 川公网安备 51152502000135号
评论
共有 条评论