资源简介
几个月前自己上手YOLOV3-keras,自己训练了一个数据集。在测试的时候,发现源码作者的测试不好用。自己稍稍修改了一下。
几点改进
(1)批量测试图片
将待测试的图片放入 './test'路径下。
测试的时候,第一张图片需要的时间大约是 2s左右,因为需要加载模型,所需时间就相对较长一些。在博主的机器上,测试一一张图片的时间大约是0.1s左右;
(2)保存测试结果
完成测试后,将测试的结果保存在result文件夹中。方便以后查看
(3)将测试结果输出为一个result.txt文件。
result.txt内容包含了每一个bbox的信息。

代码片段和文件信息
# -*- coding: utf-8 -*-
“““
Class definition of YOLO_v3 style detection model on image and video
“““

import colorsys
import os
from timeit import default_timer as timer
import time

import numpy as np
from keras import backend as K
from keras.models import load_model
from keras.layers import Input
from PIL import Image ImageFont ImageDraw

from yolo3.model import yolo_eval yolo_body tiny_yolo_body
from yolo3.utils import letterbox_image
from keras.utils import multi_gpu_model

path = ‘./test/‘  #待检测图片的位置

# 创建创建一个存储检测结果的dir
result_path = ‘./result‘
if not os.path.exists(result_path):
    os.makedirs(result_path)

# result如果之前存放的有文件,全部清除
for i in os.listdir(result_path):
    path_file = os.path.join(result_pathi)
    if os.path.isfile(path_file):
        os.remove(path_file)

#创建一个记录检测结果的文件
txt_path =result_path + ‘/result.txt‘
file = open(txt_path‘w‘)

class YOLO(object):
    _defaults = {
        “model_path“: ‘model_data/yolo.h5‘
        “anchors_path“: ‘model_data/yolo_anchors.txt‘
        “classes_path“: ‘model_data/coco_classes.txt‘
        “score“ : 0.3
        “iou“ : 0.45
        “model_image_size“ : (416 416)
        “gpu_num“ : 1
    }

    @classmethod
    def get_defaults(cls n):
        if n in cls._defaults:
            return cls._defaults[n]
        else:
            return “Unrecognized attribute name ‘“ + n + “‘“

    def __init__(self **kwargs):
        self.__dict__.update(self._defaults) # set up default values
        self.__dict__.update(kwargs) # and update with user overrides
        self.class_names = self._get_class()
        self.anchors = self._get_anchors()
        self.sess = K.get_session()
        self.boxes self.scores self.classes = self.generate()

    def _get_class(self):
        classes_path = os.path.expanduser(self.classes_path)
        with open(classes_path) as f:
            class_names = f.readlines()
        class_names = [c.strip() for c in class_names]
        return class_names

    def _get_anchors(self):
        anchors_path = os.path.expanduser(self.anchors_path)
        with open(anchors_path) as f:
            anchors = f.readline()
        anchors = [float(x) for x in anchors.split(‘‘)]
        return np.array(anchors).reshape(-1 2)

    def generate(self):
        model_path = os.path.expanduser(self.model_path)
        assert model_path.endswith(‘.h5‘) ‘Keras model or weights must be a .h5 file.‘

        # Load model or construct model and load weights.
        num_anchors = len(self.anchors)
        num_classes = len(self.class_names)
        is_tiny_version = num_anchors==6 # default setting
        try:
            self.yolo_model = load_model(model_path compile=False)
        except:
            self.yolo_model = tiny_yolo_body(Input(shape=(NoneNone3)) num_anchors//2 num_classes) \
                if is_tiny_version else yolo_body(Input(shape=(NoneNone3)) num_anchors//3 num_classes)
            self.yolo_model.load_weights(self.model_path) # make sur
属性 大小 日期 时间 名称
----------- --------- ---------- ----- ----
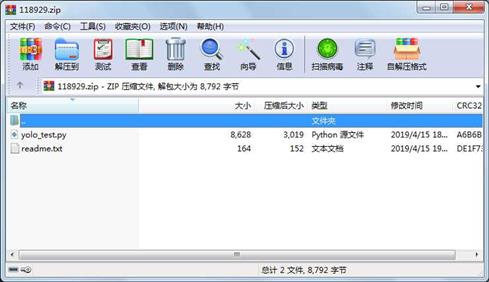
文件 8628 2019-04-15 18:12 yolo_test.py
文件 164 2019-04-15 19:35 readme.txt
相关资源
- 广联达6.0写锁包,2020年11月最新
- 机器学习个人笔记完整版v5.2-A4打印版
- 深度学习卷积神经网络可检测和分类
- GAN对抗式生成网络的应用:从图片上
- [en]深度学习[Deep Learning: Adaptive Compu
- 李宏毅-机器学习(视频2017完整)
- 吴恩达深度学习第一课第四周作业及
- 机器学习深度学习 PPT
- 麻省理工:深度学习介绍PPT-1
- Wikipedia机器学习迷你电子书之四《D
- 深度学习在遥感中的应用综述
- 深度学习数据集标注
- 深度学习算法实践源码-吴岸城
- 李宏毅深度学习ppt
- SSD目标检测算法论文-英文原版
- 台湾李宏毅教授深度学习讲义 pdf
- 基于深度学习实现人脸识别包含模型
- 深度学习与PyTorch-代码和PPT.zip
- 测试工程源码1(一种基于深度学习的
- 深度学习: MNIST的数据集
- 《深度学习》 高清版本中文PDFIan Go
- 今日头条38万条新闻数据标题
- 深度学习算法论文
- TensorFlow Machine Learning Cookbook+无码高清
- Hands-On Machine Learning with Scikit-Learn an
- Neural Networks:Tricks of the Trade+无码高清
- 基于深度学习的图像超分辨率算法论
- 人工智能初步学习总结
- 迁移学习简明手册
- 基于深度学习的软件源码漏洞预测综
 川公网安备 51152502000135号
评论
共有 条评论