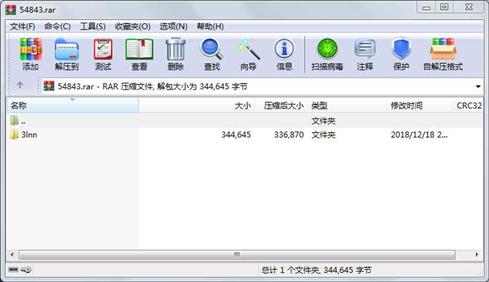
资源简介
python语言编写简单三层神经网络做二分类问题,隐含层激活函数为tanh函数,输出层为sigmoid函数,可视化loss/accuracy随迭代次数的变化以及散点图。

代码片段和文件信息
import numpy as np
import scipy.io as sio
import  h5py
from matplotlib import pyplot as plt
from data_visualize import data_visual
from sklearn import preprocessing

datapath = ‘homework.mat‘
data = sio.loadmat(datapath)

test_data_c1 = np.concatenate([data[‘xa_test‘] data[‘ya_test‘]] axis=0).transpose()  # sample_num*dim(2)
test_data_c2 = np.concatenate([data[‘xb_test‘] data[‘yb_test‘]] axis=0).transpose()  # sample_num*dim(2)


test_data_c1 = np.concatenate([test_data_c1 np.ones((test_data_c1.shape[0] 1))] axis=1)
test_data_c2 = np.concatenate([test_data_c2 np.ones((test_data_c2.shape[0] 1))] axis=1)


test_data = np.concatenate([test_data_c1 test_data_c2] axis=0)
test_scaled = preprocessing.scale(test_data)

test_label_c1 = np.ones((test_data_c1.shape[0] 1))
test_label_c2 = np.zeros((test_data_c2.shape[0] 1))
test_label = np.concatenate([test_label_c1 test_label_c2] axis=0)


class NNetwork(object):
    def __init__(self layer_dims weight1 weight2):
        self.layer_dims = layer_dims
        self.input_dim = layer_dims[0]
        self.hidden_dim = layer_dims[1]
        self.output_dim = layer_dims[2]
        self.weight1 = weight1
        self.weight2 = weight2

    def forward(self data):

        z1 = np.dot(data self.weight1)  # samples_num*hidden_dim
        a1 = np.tanh(z1)  # samples_num*hidden_dim
        z2 = np.dot(a1 self.weight2)  # samples_num*output_dim
        tmp = np.exp(-z2)
        output = 1 / (1 + np.exp(-z2))  # samples_num*output_dim
        return output


def accuracy(output target):
    samples = output.shape[0]
    output = output.reshape(-1)
    target = target.reshape(-1)

    output = (output - 0.5 > 0)
    correct_num = np.where(output==target)[0].shape[0]

    return round(correct_num/samples 4)

samples_num = test_data.shape[0]


loss = []
acc = []

f = h5py.File(‘model_weights.hdf5‘‘r‘)
weight1 = f[‘weight_1‘]
weight2 = f[‘weight_2‘]
nn = NNetwork([weight1.shape[0] weight2.shape[0] weight2.shape[1]] weight1 weight2)
output = nn.forward(test_scaled)


loss = 0.5 * np.sum(np.sum((test_label - output) ** 2 axis=0))
acc = accuracy(output test_label)

print(‘test_loss=‘ loss ‘test_accuracy=‘ acc)


data_visual(test_data output test_label)
属性 大小 日期 时间 名称
----------- --------- ---------- ----- ----
文件 2327 2018-12-16 20:53 3lnn\b-test.py
文件 5468 2018-12-16 20:10 3lnn\b-train.py
文件 755 2018-12-15 23:28 3lnn\data_visualize.py
文件 332464 2018-12-15 20:13 3lnn\homework.mat
文件 3631 2018-12-16 18:34 3lnn\README.md
目录 0 2018-12-18 21:48 3lnn
----------- --------- ---------- ----- ----
344645 6
- 上一篇:python爬取新浪微博源代码
- 下一篇:基于tensorflow的遥感影像分类
相关资源
- KNN算法实战
- 基于TensorFlow实现CNN文本分类实验指导
- 利用CNN网络实现mnist图像分类,手动实
- Python 3 Web Development. Beginners Guide
- Python-本项目基于yolo3与crnn实现中文自
- Python-用PyTorch10实现FasterRCNN和MaskRCNN比
- Python-基于tensorflow实现的用textcnn方法
- Python-FastSCNN的PyTorch实现快速语义分割
- Long Short-Term Memory Networks With Python
- OCR:一个有趣的网页版手写数字识别
- Beginning Python: From Novice to Professional
- Python3实现KNN的三个包含数据集,水果
- beginning django (使用Python进行Web应用程
- 基于深度学习堆栈自动编码器模型的
- 性别模型库 simple_CNN.81-0.96.hdf5
- lightened_cnn_S 5M模型
- Django for beginners 2.1
- Hands On Machine Learning with Python: Concept
- knn算法识别mnist图片-python3
- TBCNN 源码
- faster rcnn(python+caffe)源代码
- MLP/RNN/LSTM模型进行IMDb情感分析
- CNN卷积神经网络PYTHON
- 基于CNN的图像搜索demo
- python实现的卷积神经网络CNN无框架
- 机器学习对应的相关python代码SVM、C
- thonny使用的pip包
- 基于 CNN 的疲劳检测源码-Python
- CNN网络代码,数据集,及对应论文和
- Faster-RCNN-TensorFlow-Python3.5-master
 川公网安备 51152502000135号
评论
共有 条评论