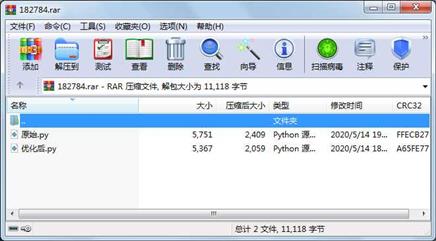
资源简介
文件中原始代码利用CNN对CIFAR10数据集进行分类,准确度达到0.67,优化代码通过权重正则化、数据增强,增加全连接层等方式进行优化,准确度达到0.85。

代码片段和文件信息
# -*- coding: utf-8 -*-
“““
Created on Tue Jan  8 14:04:20 2019

@author: shihui
“““

import tensorflow as tf
import numpy as np
import cifar10cifar10_input
import time

‘‘‘
初始化权重函数
‘‘‘
def variable_with_weight_loss(shapestdw1):
    var = tf.Variable(tf.truncated_normal(shapestddev=std)dtype=tf.float32)
    if w1 is not None:
        weight_loss = tf.multiply(tf.nn.l2_loss(var)w1name=“weight_loss“)
        tf.add_to_collection(“losses“weight_loss)
    return var

‘‘‘
损失函数
‘‘‘
def loss_func(logitslabels):
    labels = tf.cast(labelstf.int32)
    cross_entropy = tf.nn.sparse_softmax_cross_entropy_with_logits(logits=logits
                           labels=labelsname=“cross_entropy_per_example“)
    cross_entropy_mean = tf.reduce_mean(tf.reduce_sum(cross_entropy))
    tf.add_to_collection(“losses“cross_entropy_mean)
    return tf.add_n(tf.get_collection(“losses“)name=“total_loss“)


if __name__ == “__main__“:
    #设置最大迭代次数
    max_steps = 10000
    #设置每次训练的数据大小
    batch_size = 128
    #下载解压数据
    cifar10.maybe_download_and_extract()
    # 设置数据的存放目录
    cifar10_dir = “C:/Users/29811/Desktop/cifar10/dataset/cifar-10-batches-bin“
    #获取数据增强后的训练集数据
    images_trainlabels_train = cifar10_input.distorted_inputs(cifar10_dirbatch_size)
    #获取裁剪后的测试数据
    images_testlabels_test = cifar10_input.inputs(eval_data=Truedata_dir=cifar10_dir
                                                   batch_size=batch_size)
    #定义模型的输入和输出数据
    image_holder = tf.placeholder(dtype=tf.float32shape=[batch_size24243])
    label_holder = tf.placeholder(dtype=tf.int32shape=[batch_size])

    #设计第一层卷积
    weight1 = variable_with_weight_loss(shape=[55364]std=5e-2w1=0)
    kernel1 = tf.nn.conv2d(image_holderweight1[1111]padding=“SAME“)
    bais1 = tf.Variable(tf.constant(0.0dtype=tf.float32shape=[64]))
    conv1 = tf.nn.relu(tf.nn.bias_add(kernel1bais1))
    pool1 = tf.nn.max_pool(conv1[1331][1221]padding=“SAME“)
    norm1 = tf.nn.lrn(pool14bias=1.0alpha=0.001 / 9beta=0.75)

    #设计第二层卷积
    weight2 = variable_with_weight_loss(shape=[556464]std=5e-2w1=0)
    kernel2 = tf.nn.conv2d(norm1weight2[1111]padding=“SAME“)
    bais2 = tf.Variable(tf.constant(0.1dtype=tf.float32shape=[64]))
    conv2 = tf.nn.relu(tf.nn.bias_add(kernel2bais2))
    norm2 = tf.nn.lrn(conv24bias=1.0alpha=0.01 / 9beta=0.75)
    pool2 = tf.nn.max_pool(norm2[1331][1221]padding=“SAME“)

    #第一层全连接层
    reshape = tf.reshape(pool2[batch_size-1])
    dim = reshape.get_shape()[1].value
    weight3 = variable_with_weight_loss([dim384]std=0.04w1=0.004)
    bais3 = tf.Variable(tf.constant(0.1shape=[384]dtype=tf.float32))
    local3 = tf.nn.relu(tf.matmul(reshapeweight3)+bais3)

    #第二层全连接层
    weight4 = variable_with_weight_loss([384192]std=0.04w1=0.004)
    bais4 = tf.Variable(tf.constant(0.1shape=[192]dtype=tf.float32))
    local4 = tf.nn.relu(tf.matm
属性 大小 日期 时间 名称
----------- --------- ---------- ----- ----
文件 5367 2020-05-14 18:03 优化后.py
文件 5751 2020-05-14 19:18 原始.py
----------- --------- ---------- ----- ----
11118 2
相关资源
- DeepLabV3-Tensorflow-master
- 基于TensorFlow实现CNN文本分类实验指导
- 利用CNN网络实现mnist图像分类,手动实
- tensorflow2.0 yolo3目标检测算法
- tensorflow制作自己的灰度图像数据集并
- anaconda下安装tensorflow(注:不同版本
- 北京大学曹健老师-人工智能实践:
- Deep Learning With Python - Jason Brownlee
- Python-自然场景文本检测PSENet的一个
- Python-用PyTorch10实现FasterRCNN和MaskRCNN比
- Python-高效准确的EAST文本检测器的一个
- Python-TensorFlow弱监督图像分割
- Python-基于tensorflow实现的用textcnn方法
- Python-FastSCNN的PyTorch实现快速语义分割
- Python-subpixel利用Tensorflow的一个子像素
- 【官方文档】TensorFlow Python API docume
- 基于深度学习堆栈自动编码器模型的
- 性别模型库 simple_CNN.81-0.96.hdf5
- lightened_cnn_S 5M模型
-
tensorflow画风迁移代码 st
yle transfer - TBCNN 源码
- faster rcnn(python+caffe)源代码
- 简单粗暴 TensorFlow
- [PDF] Reinforcement Learning With Open AI Tens
- tensorflow目标检测代码
- CNN卷积神经网络PYTHON
- 基于CNN的图像搜索demo
- python实现的卷积神经网络CNN无框架
- 基于Python的手写字体识别系统
- 基于Tensorflow的人脸识别源码
 川公网安备 51152502000135号
评论
共有 条评论